Recently, LCSC has released a fully open-source ColorEasyDuino development board that is compatible with the Arduino ecosystem. Its schematics and hardware are entirely open-source. The board boasts a compact design with colorful silk screen printing, offering three color options for engineers: pink, gold, and green, which imbues the development board with an artistic atmosphere.
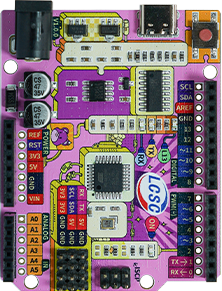
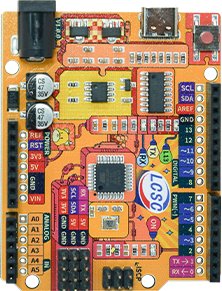
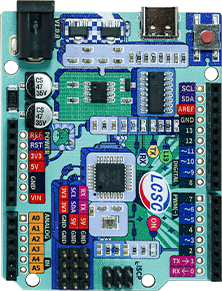
User hywing was pleasantly surprised to find the ColorEasyDuino, an Arduino development board, and shared this discovery on his blog. Below is the translated version of blogger hywing’s ColorEasyDuino getting started guide, intended for reference by engineers everywhere.
Introduction
ColorEasyDuino is a development board compatible with the Arduino ecosystem, which has a variety of peripheral interfaces: UART, I2C, SPI, ADC, PWM, etc. The design of the development board refers to the prototype of Arduino Uno and uses the ATMEGA328P chip. Its appearance design is compact, bringing out all the IOs for developers. It has strong playability and expandability, coupled with the rich development resources of the Arduino platform, making it an excellent choice for makers to try out.
Development Board
- The power supply is 5V, using a Type C port for power supply, and can also be powered through a DC power jack.
- It does not support online debugging, which may be due to the inherent lack of support in the Arduino Uno.
- Four LEDs: one power indicator, one customizable by the user, and two others for indicating the status of the serial port (which can also be used for custom purposes).
- A reset button.
Chip
- AVR RISC architecture
- Memory: 2K SRAM, 32K FLASH, 1K EEPROM
- 23 programmable I/Os
- 8 10-bit ADCs, 5V reference voltage
- 2 8-bit timer/counters, 1 16-bit timer/counter
- 6 PWMs
- Built-in USART, I2C, SPI
- Clock can reach up to 16MHz
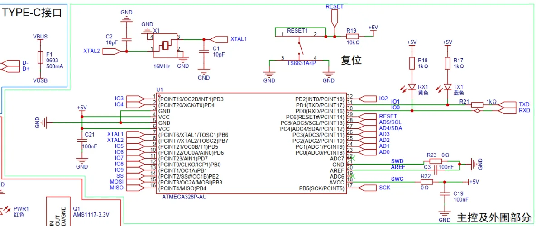
Minimum System
- Similar to the 51 microcontroller, it mainly consists of three parts:
- Power supply circuit
- Crystal oscillator circuit
- Reset circuit
Environment
First, download the IDE, and you can directly extract and open Arduino IDE.exe. The version of Arduino I used here is: 2.3.3-nightly-20240608.
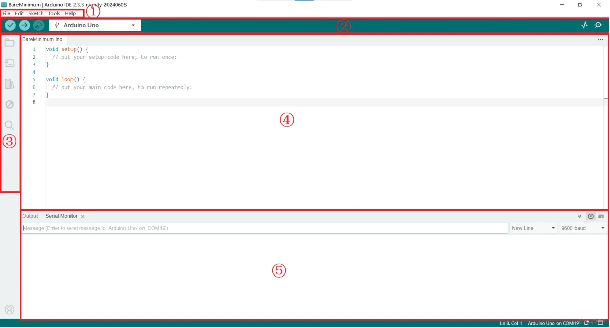
- Menu bar: common function categories, such as File (new program, code examples, etc.), Edit (text editing function), Sketch (compile, download, etc.), Tools, Help, etc.
- Toolbar: compile (verify), download (upload), development board configuration (model + serial port), serial plotter, serial monitor, and other function entry points are located here.
- Function area: SKETCHBOOK, development board management, software library management, debugging, search, etc.
- Code text editing area.
- Console: compile output, serial port output, etc.
Minimum Example
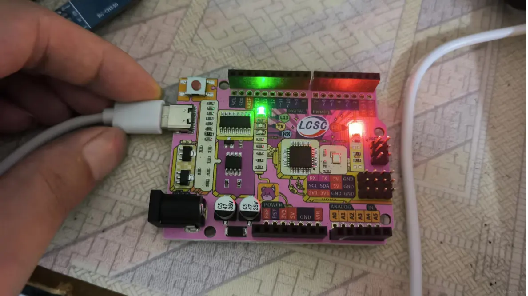
The setup function is used to configure the hardware resources of the development board, such as the working state of GPIO; the loop function is a task, which is a dead loop; these two functions are essential for every Sketch program, which may be different from the program codes of 51 or STM32; and Sketch supports C++ programming; the following example is located in File -> Examples -> 0.1 Basics -> Blink, which is used to light up the onboard blue LED in a loop.
// the setup function runs once when you press reset or power the board
void setup() {
// initialize digital pin LED_BUILTIN as an output.
pinMode(LED_BUILTIN, OUTPUT);
}
// the loop function runs over and over again forever
void loop() {
digitalWrite(LED_BUILTIN, HIGH); // turn the LED on (HIGH is the voltage level)
delay(1000); // wait for a second
digitalWrite(LED_BUILTIN, LOW); // turn the LED off by making the voltage LOW
delay(1000); // wait for a second
}
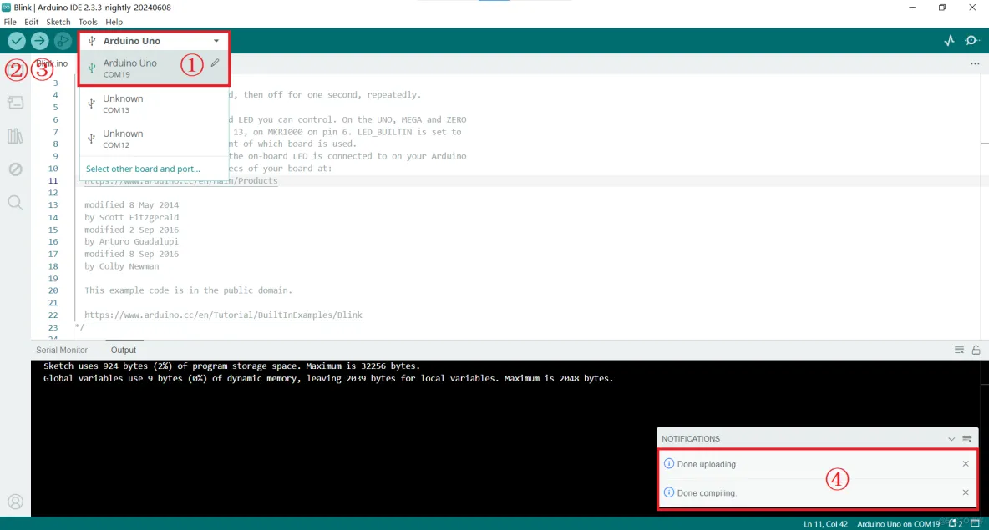
Connect the development board’s Type C port to the computer with a USB cable, and perform the following operations in the IDE:
- Configure the development board as: Arduino Uno, and configure the serial port as the corresponding serial port.
- Click the Verify button on the toolbar, and a dialog box pops up with “Done compiling” indicating that there is no problem with the compilation.
- Then click Upload.
- A dialog box pops up, and “Done uploading” indicates that there is no problem with the program download, and the output console will output the size of the current program and the disk space usage ratio.
Experimental effect: you can see that the green LED on the development board is being lit up in a loop.
Summary
- Sketch refers to the Arduino program, which is its proper name.
- SKETCHBOOK, I understand it should be the development guide (document) of the Arduino program.
- The difficulty of getting started with the IDE is almost zero, and it is very easy to run an example.
- Arduino has a relatively complete management of development boards and open source libraries, forming a hardware and software system, and Examples can be almost seamlessly transplanted.
Explore the ColorEasyDuino development board and more electronic components at LCSC, your global distributor with a vast selection and fast shipping from intelligent warehouses spanning 130,000 square meters.
Claim Your $5 Coupon (Please note: Customers must be logged into their LCSC account to redeem; new users should register first.)
Source: blogger hywing
Related Articles:
LCSC ColorEasyDuino Development Board
Frequently Asked Questions for ColorEasyDuino Development Board
