-
Keil Community Edition Introduction
Recently, Keil officially announced the release of a new version, the Keil MDK Community Edition (MDK_Community edition).
This version mainly features the following:
- It is available for non-commercial free evaluation and use by electronic enthusiasts, students, scholars, and other groups.
- There is no code size limit.
- Supports Arm Compiler 6: It can provide streamlined code and powerful performance for all products based on the Arm Cortex-M.
- Access to over 9500 supported Cortex-M processor-based microcontroller devices.
- Usable for the CMSIS standard framework of microprocessors based on the Arm architecture.
- A large number of freely available middleware (such as Keil RTX5, lwIP, CMSIS-FreeRTOS, etc.).
The overview of MDK is shown in Figure 1-1-1.
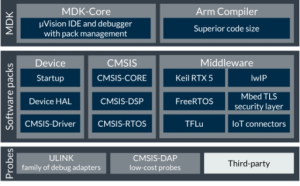
Figure 1-1-1
-
Download and Installation of Keil
Link to download the Keil community version: https://www.keil.arm.com/mdk-community/
After opening the above link, you will enter the login interface, as shown in Figure 2-1-1.

Figure 2-1-1
If you have an account, you can log in directly. If not, you will need to register.
2.1 Registration
Click on “Sign up” at the bottom right to register. Then, you can fill in your email address and click “Send verification code” to get the verification code, as shown in Figure 2-2-1.
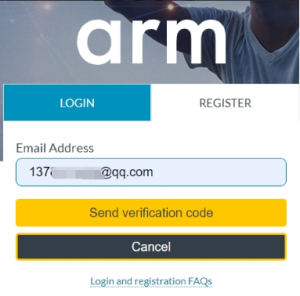
Figure 2-2-1
After a while, you will receive a verification code in your email, as shown in Figure 2-2-2.
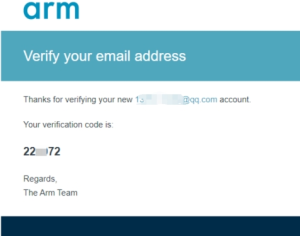
Figure 2-2-2
Fill in the “Verification code” received from your email, as shown in Figure 2-2-3.
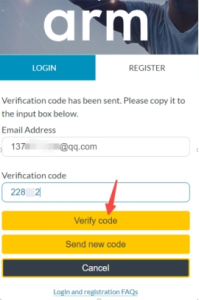
Figure 2-2-3
Fill in the required information according to your situation and click “Create”, as shown in Figure 2-2-4.
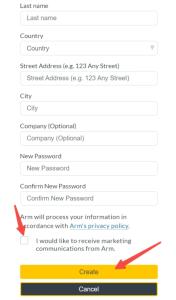
Figure 2-2-4
2.2 Login
Enter your registered account and password, then click “Log in” to log in, as shown in Figure 2-3-1.
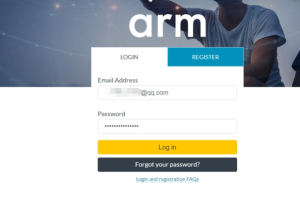
Figure 2-3-1
After logging in, click “Download Keil MDK”, as shown in Figure 2-3-2.

Figure 2-3-2
Note: Do not close this page because you will come back to copy the PSN number here, as shown in Figure 2-3-3.
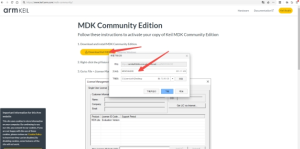
Figure 2-3-3
2.3 Installation
After the download is complete, you can proceed with the installation, as shown in Figure 2-4-1.

Figure 2-4-1
Right-click on the installation package and run it as an administrator, as shown in Figure 2-4-2.
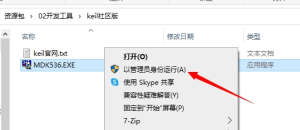
Figure 2-4-2
Click “Next”, as shown in Figure 2-4-3.

Figure 2-4-3
Check and continue to the next step, as shown in Figure 2-4-4.

Figure 2-4-4
Select the installation path, which can be the default or another directory such as D:, but make sure there are no Chinese characters in the path, as shown in Figure 2-4-5.

Figure 2-4-5
Fill in your personal information here, as shown in Figure 2-4-6.

Figure 2-4-6
Wait for a while, as shown in Figure 2-4-7.
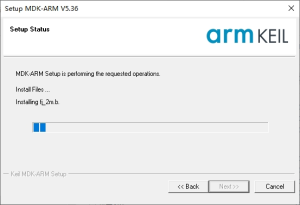
Figure 2-4-7
After the installation is complete, click “Finish”, as shown in Figure 2-4-8.

Figure 2-4-8
After clicking “Finish”, the following interface will automatically pop up, close this window, as shown in Figure 2-4-9.
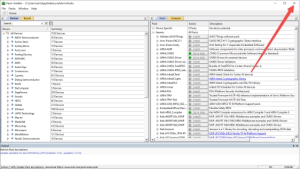
Figure 2-4-9
2.4 Activation
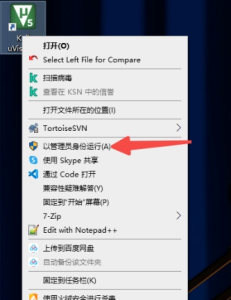
Find MDK on the desktop or in the Win10 start position and run it as an administrator, as shown in Figure 2-5-1.
Click “License Management” under “File”, as shown in Figure 2-5-2.
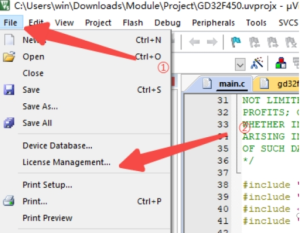
Figure 2-5-2
Click the “Get LIC via Internet” button, as shown in Figure 2-5-3.

Figure 2-5-3
Click “Confirm”, as shown in Figure 2-5-4.
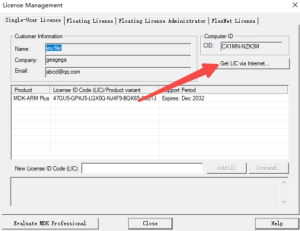
Figure 2-5-4
After clicking “OK”, a web page will pop up, and then fill in some of your information, as shown in Figure 2-5-5.
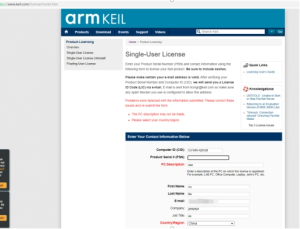
Figure 2-5-5
Open the page you downloaded earlier and find the PSN serial number and copy it, as shown in Figure 2-5-6.
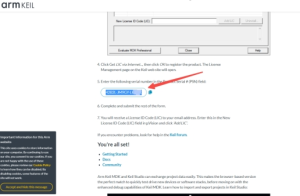
Figure 2-5-6
Email must be correct because the activation code will be sent via email, as shown in Figure 2-5-7.
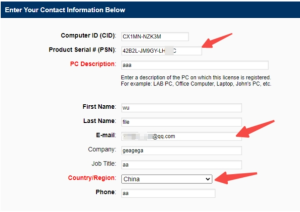
Figure 2-5-7
Then scroll to the bottom and click “Submit”, as shown in Figure 2-5-8.
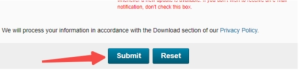
Figure 2-5-8
At this point, the activation code will be sent to your email, as shown in Figure 2-5-9.
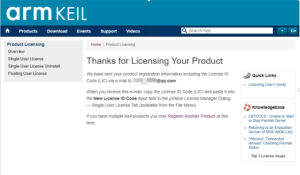
Figure 2-5-9
Copy the activation code received in your email, as shown in Figure 2-5-10.
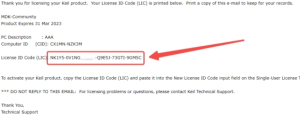
Figure 2-5-10
Paste the copied License into the “New License ID Code (LIC)” in Keil, and then click “Add LIC”, as shown in Figure 2-5-11.

Figure 2-5-11
After activation, if a date appears, it means the activation is successful. If you encounter the following problem, close and run it again in administrator mode, as shown in Figure 2-5-12.
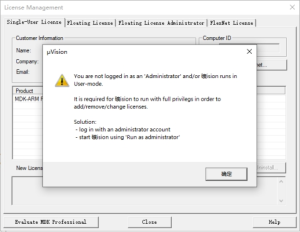
Figure 2-5-12
2.5 Precautions
① The installation directory must not contain Chinese characters.
② Run Keil in administrator mode.
Related Articles:
LCSC Liangshan Development Board: Background, Hardware and Features